A number of screens within OA LodgeMaster will contain a grid of information. Many of the controls for interacting with these grids are common to all of the screens, so this page is an overview of these common features. Pages that have specific differences or additional controls will have those additional controls documented on the page about that screen (for example the Member Manager).

The above example is from the Member Manager.
Changes you make to sorting, filtering, or column layout will not stick unless you save the view.
About right-clicking
If you have a Mac with a single-button mouse, you can hold the Control (⌃) key and click to emulate a right-click.
On a touchscreen device, you can tap and hold to open the right-click menu.
Interacting with columns
Sorting
Clicking on a column name will cause the grid to sort by the contents of that column. The column which is currently being used for sorting will be indicated with a small arrow pointing up or down on the right-hand side of that column title (see the OALM ID and Full Name columns in the above example).
Clicking a column which is already being used for sorting will reverse the sort direction. The sort direction will be indicated by which direction the triangle is pointing.
If you hold the Shift key and click on another column name, it will ADD that column to the sort instead of replacing the existing sort (so you can sort multiple columns at once).
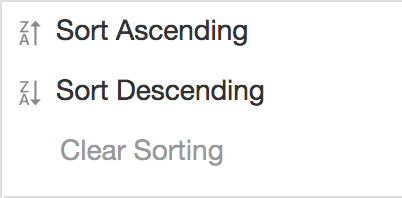
You can directly set the direction by right-clicking on the column name and choosing "Sort Ascending" or "Sort Descending" from the dropdown menu that appears. When you use this option, the sort for this column will be added without removing existing sorting on other columns, so it is possible to sort on multiple columns by using this.
You can also clear the sort by choosing "Clear Sorting"
Reordering Columns
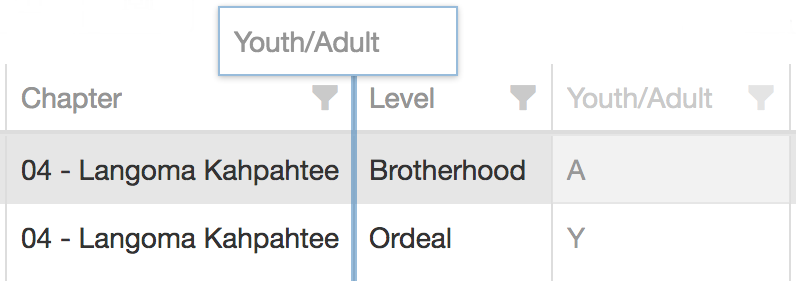
You can change which order the columns appear in by dragging the column name with the mouse. When you start dragging a column name, a "ghost" of the column header will follow your mouse pointer. When you hover the mouse over the border between two other columns, a blue bar between those columns should appear to tell you it's safe to drop the column there. The column will then move to the place you drop it. If there was not a blue bar between the columns in that spot when you dropped it, it will return to where it was.
Adding or Removing Columns
Many grids have more fields available for display than what is initially shown in the grid. There are a few different ways to open the list of available fields.
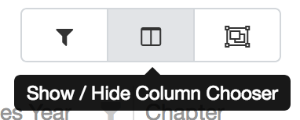
Some screens will have a Column Chooser button on the screen. The one from the Member Manager is shown on the left here.
The column chooser box will appear with a list of the fields which are not already included in the grid. You may notice that the fields appear similar to the column headers in the grid.
To add a column to the grid, find it in the column chooser box, and drag it from the Column Chooser to the position where you want it to appear. As above with reordering columns, a blue bar should appear between the columns when you are hovering a spot where the column can be placed.
To remove a column from the grid, drag the column header for that column out of the header and drop it in the Column Chooser box. You do not have to drop it in order, it just needs to be in the box, it will sort to the correct place.

Filtering
Pinning columns

In most grids, each column will have a small funnel icon to the right of the column name (as shown above where the red arrows are pointing). Clicking on the funnel icon will give you a list of the unique values in that column with checkboxes next to them. If you are familiar with Excel spreadsheets, this works very similar to the AutoFilter function in Excel.
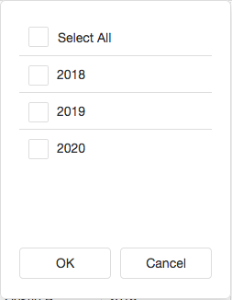
Check the boxes next to the values you want to see, then click OK. Only those values will be shown in the column. You can do this to more than one column if you choose. When a filter like this is active, the funnel icon will be a darker color (like the Max Dues Year column in the screenshot above). To remove a filter, click on the funnel icon, then uncheck all of the boxes which are checked, then click OK.
Advanced Filters
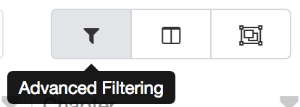
Some screens will have an Advanced Filtering button on the screen. The one from the Member Manager is shown on the left here.
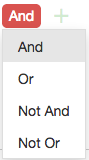
In most grids where this is available, the dialog will look like this:
![]()
In the Member Manager, there are a lot of additional options in this dialog. There is a separate Advanced Filtering section on the Member Manager page which explains the additional options related to the Member Manager.
Filter Groups
( work in progress )